MySQL
If you're using AWS Aurora MySQL, you'll need to make a few configuration changes via the AWS console to enable Readyset Cache to properly replicate tables.
Instructions
1. Establish a network connection
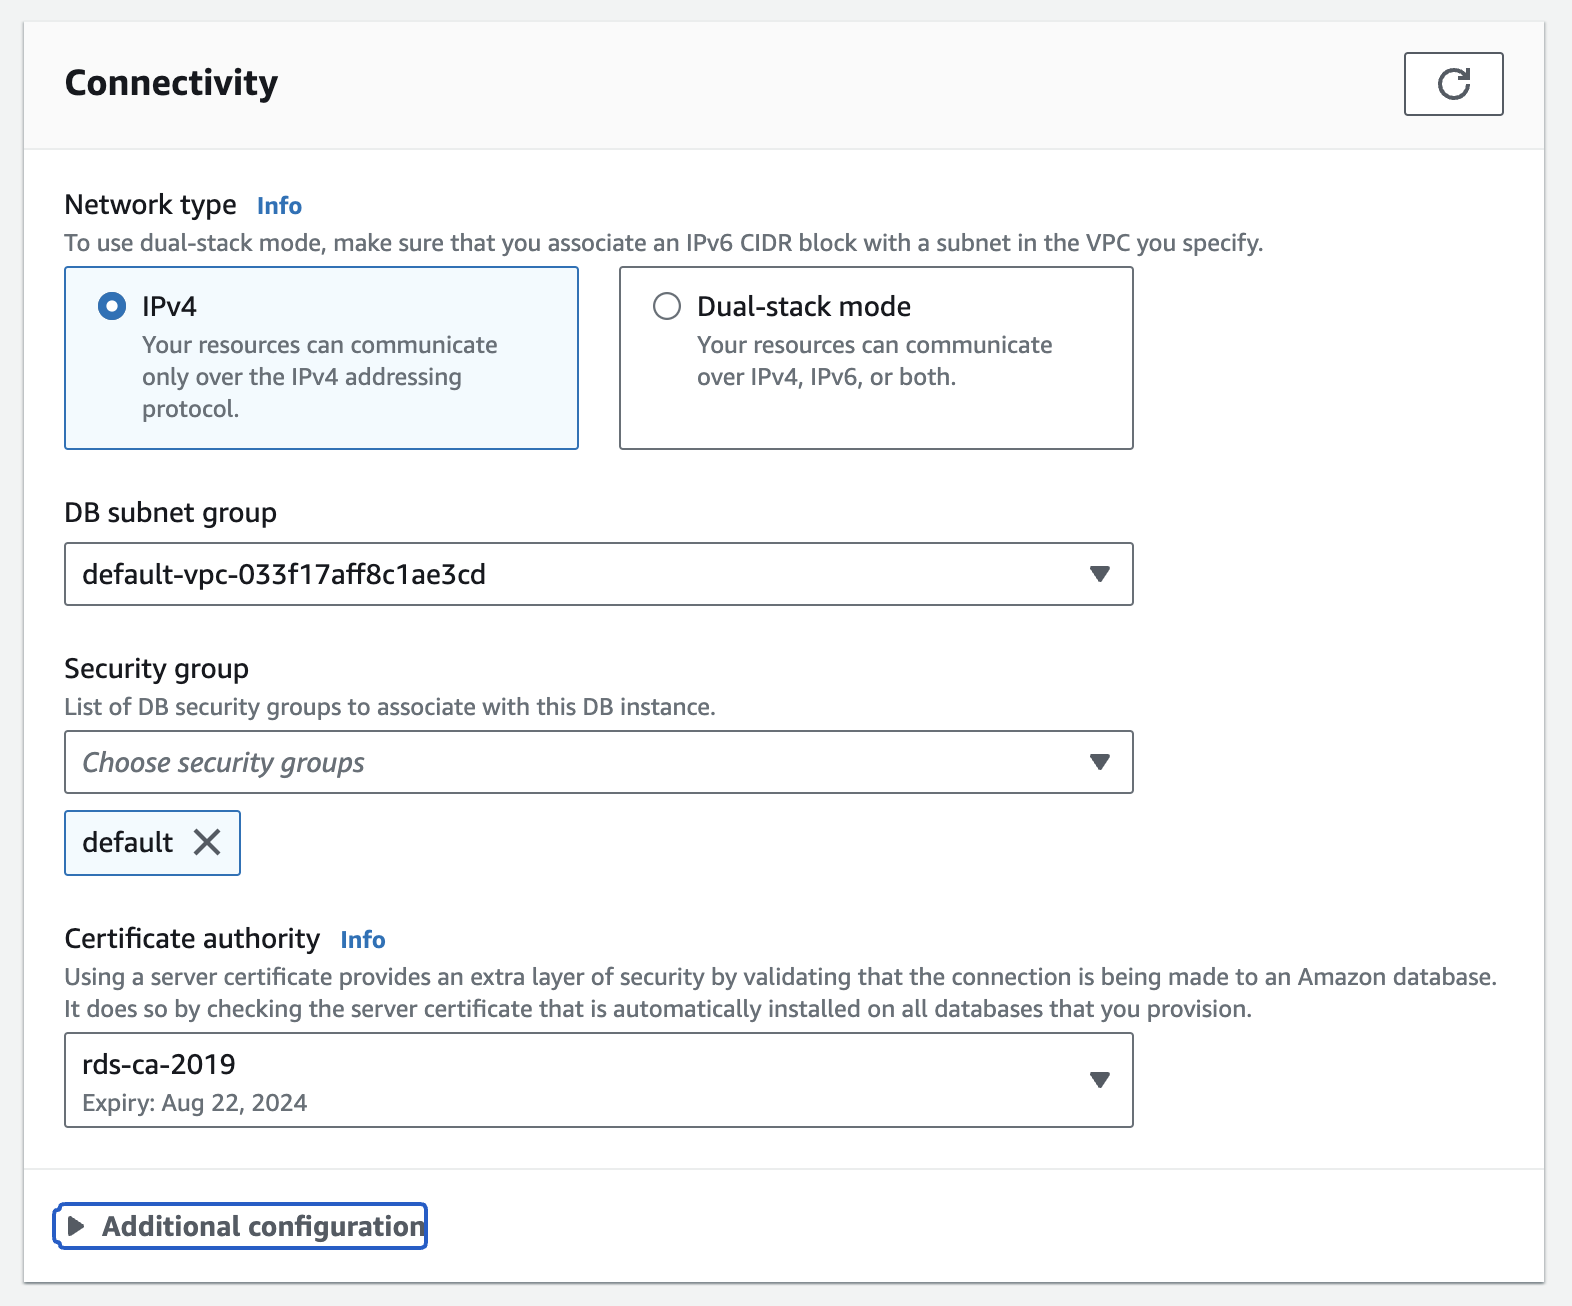
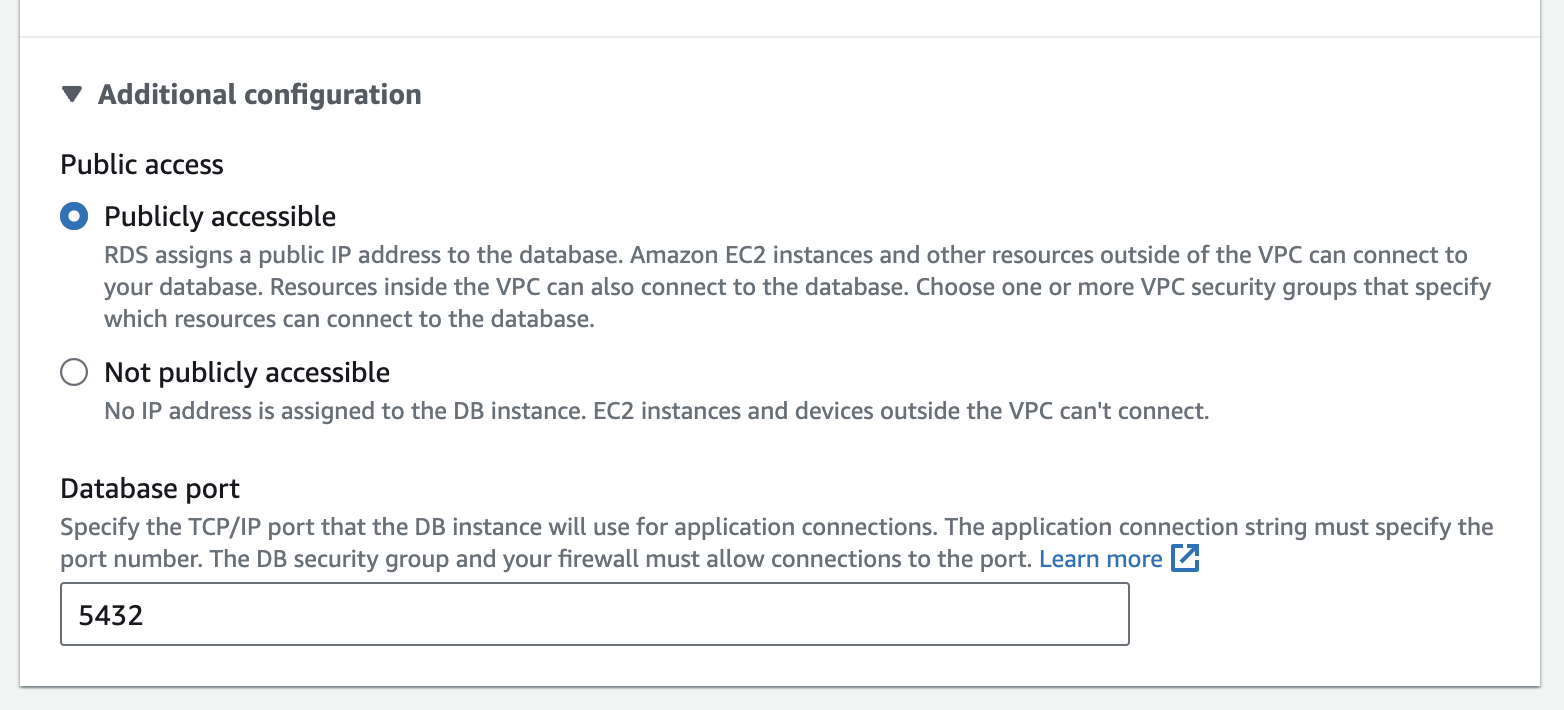
To make sure Readyset Cache can connect with your database, the database will have to be publicly accessible.
- Click on RDS, which can be found by searching for it in the search bar, under the Services menu, or in your Recently Visited area. Within RDS under the Resources section, select DB instances.
- Choose the write node instance you want to use.
- Click the Modify button in the upper right corner.
- In the Connectivity section, click on Additional configurations.
- Under Public access, choose Publicly accessible.
- Click on Continue at the bottom of the page.
- Select when you want to apply the change and click Modify DB instance.
2. Enable binary logging
Readyset Cache replicates changes from the MySQL binary log, so binlog must be enabled with row-based logging at the cluster level.
- Under the Resources section, select Parameter groups and create a new DB Cluster Parameter Group for your Aurora MySQL version.
- Edit the group and set
binlog_formattoROWandbinlog_row_imagetoFULL. - Associate the cluster parameter group with your Aurora cluster.
- Reboot the writer instance if required for the parameters to take effect.
For the full list of binlog variables Readyset Cache expects, see General MySQL configuration.
3. Set binlog retention
Ensure the binary logs are retained long enough for Readyset Cache to complete its initial snapshot. Connect to the write node and run:
call mysql.rds_set_configuration('binlog retention hours', 24);A reasonable value here is one hour of retention for every 150 GB of database size.
4. Grant privileges to the Readyset Cache user
Grant the Readyset Cache user the privileges it needs to snapshot and replicate. See General MySQL configuration for the full list and an example GRANT statement.